

Create a New Page
Creating a status page only takes about a minute. Before you start, have at least one service configured in Rootly that you can show on your page. You can add services under Configuration → Services, or import them from PagerDuty if you have that integration set up. To create a new status page:1
Open Status Pages
In the Rootly navigation bar, click on Configuration, then Status Pages.
2
Add a New Page
Click Add New Status Page.
3
Name the Page
Give your status page a name and description. These are internal to Rootly, and will not be used on the actual Status Page.
Customize Your Status Page
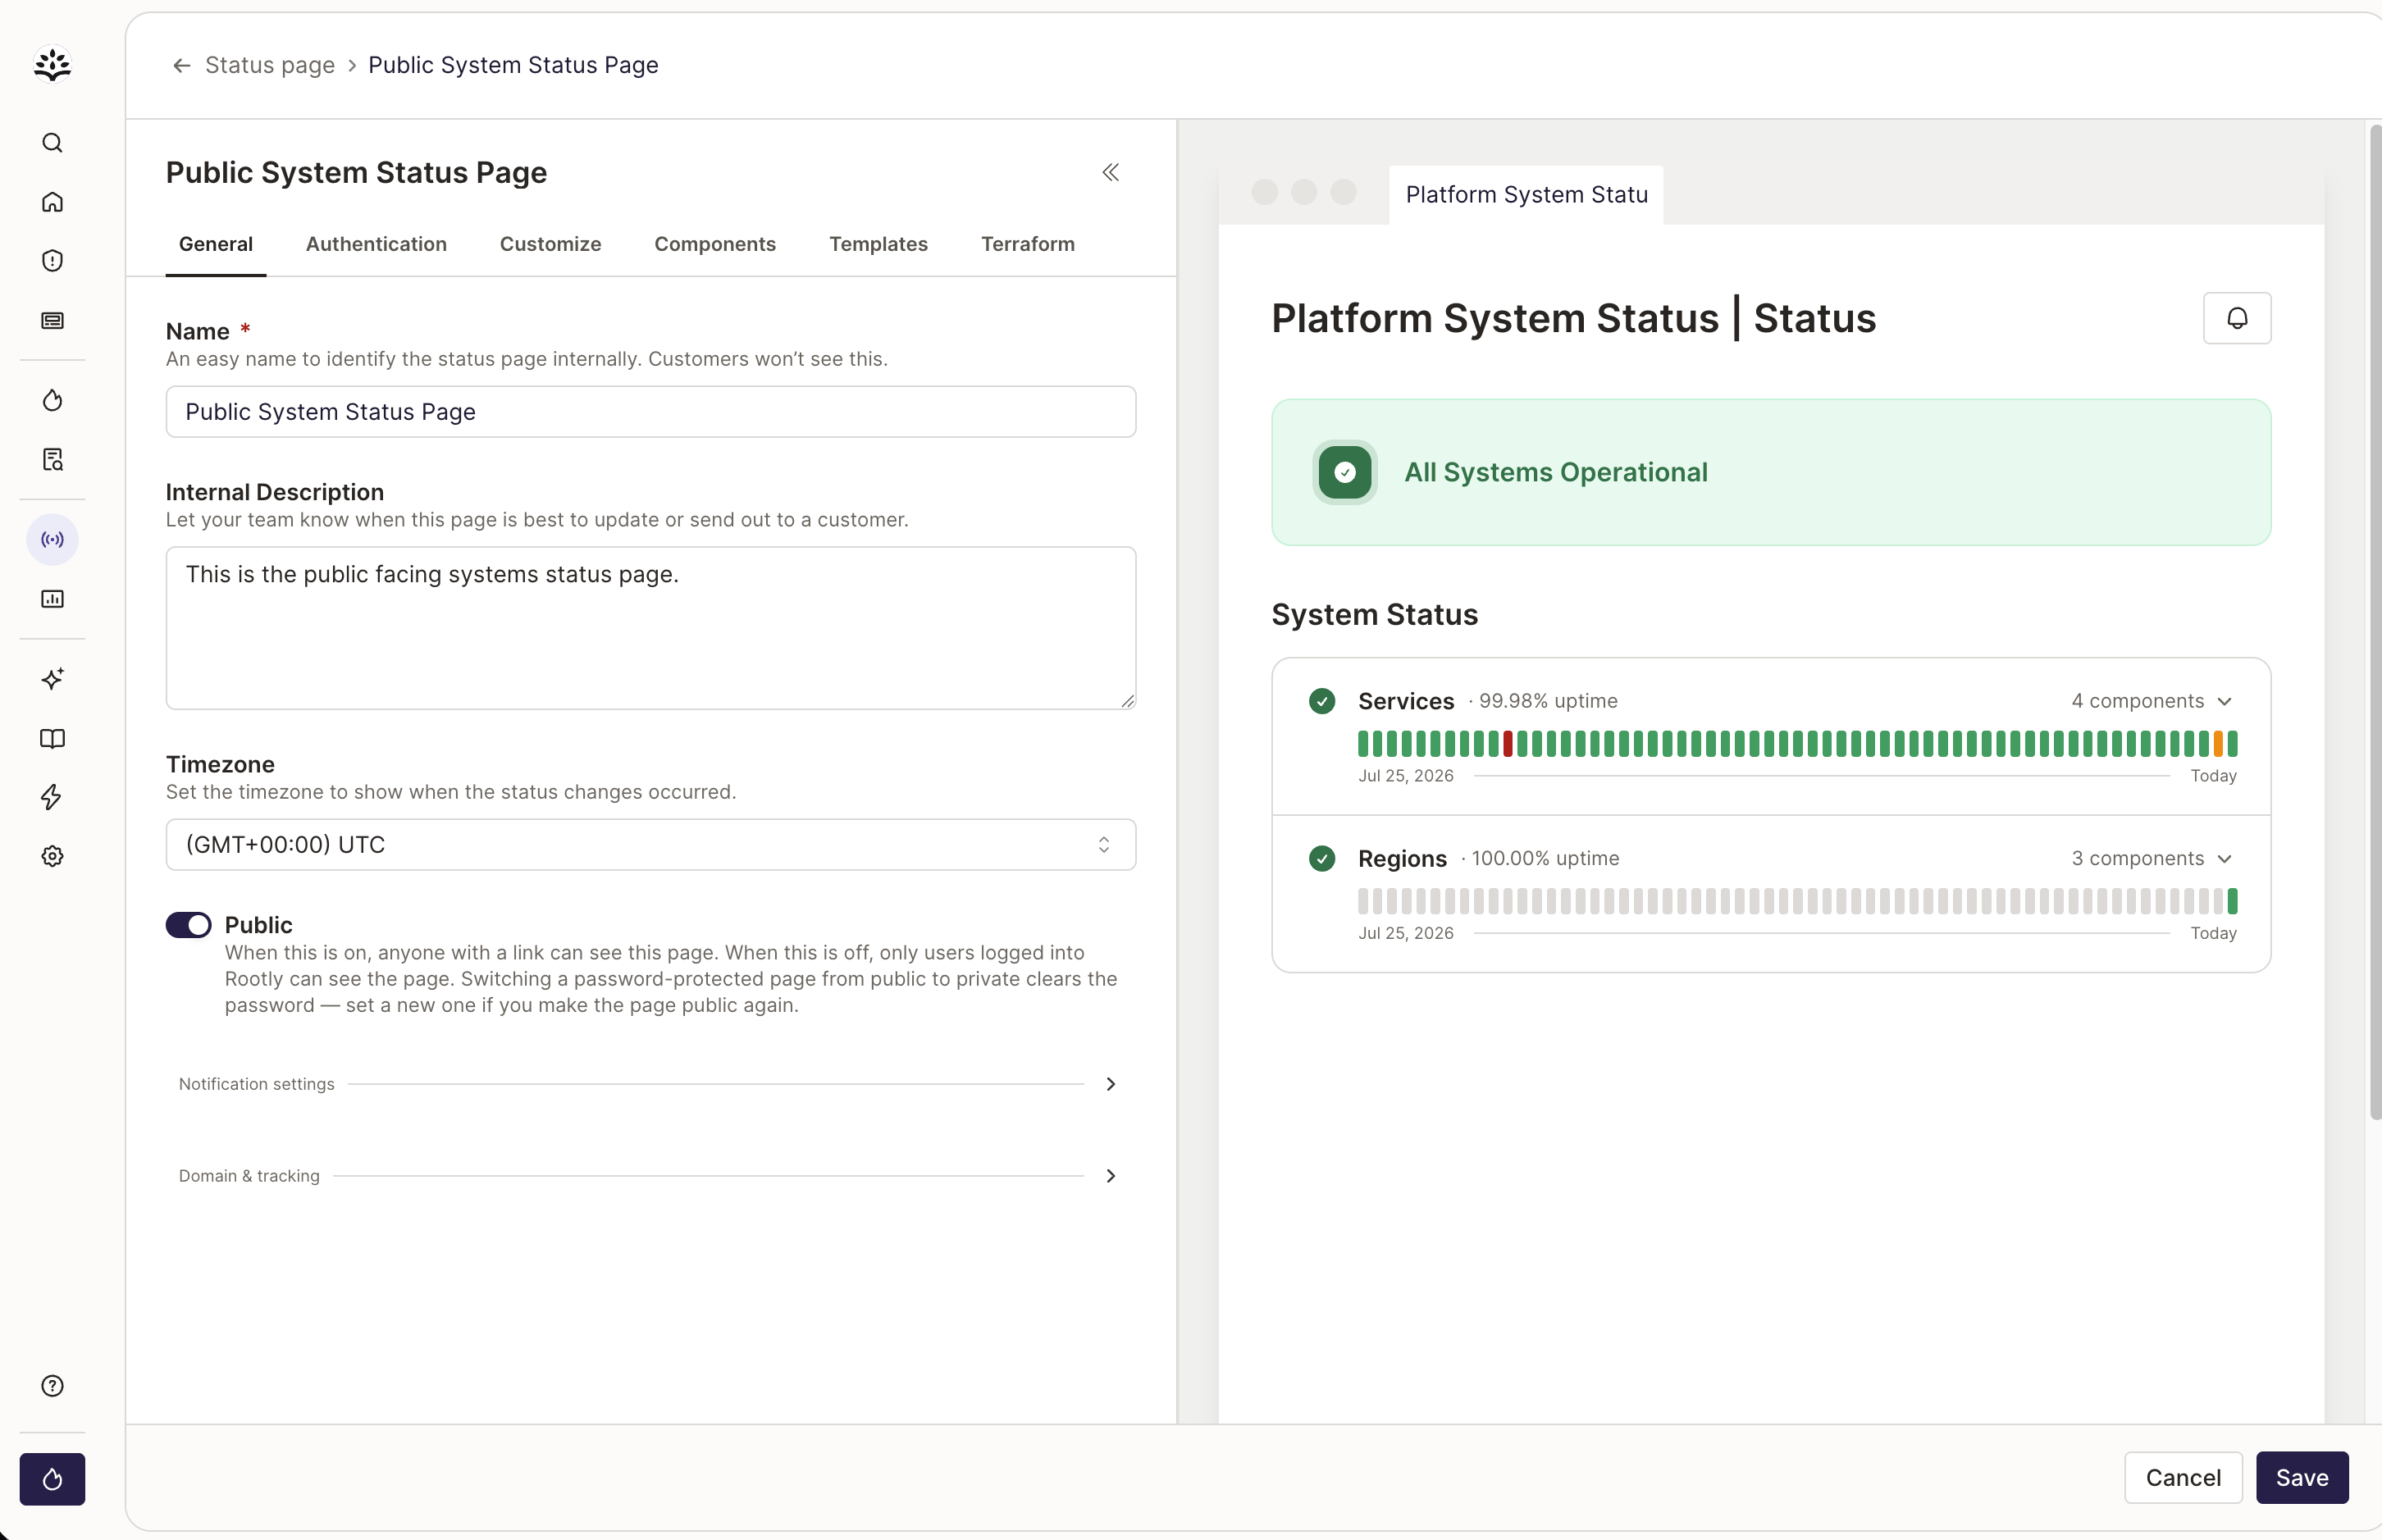
Once you’ve created your page, open it and click Edit to tailor it to your audience. The editor has these tabs: General, Authentication, Customize, Components, Templates, and Terraform. A live preview on the right updates as you make changes.General
Change the name and description of your status page here. These are internal only, so make them descriptive for other Rootly admins. You can also choose whether the page is private or public. Learn more about public and private status pages. By default, Rootly gives each status page a URL in this format:rootly.com/teams/[your-org-name]/status-pages/[status-page-name]/[public/private]
To use your own domain, follow Custom Domain Names for Status Pages. You may need help from your team to configure the domain and its DNS records.
Customize
Change the default content and look and feel of your page in the Customize tab. The preview on the right reflects your changes as you make them.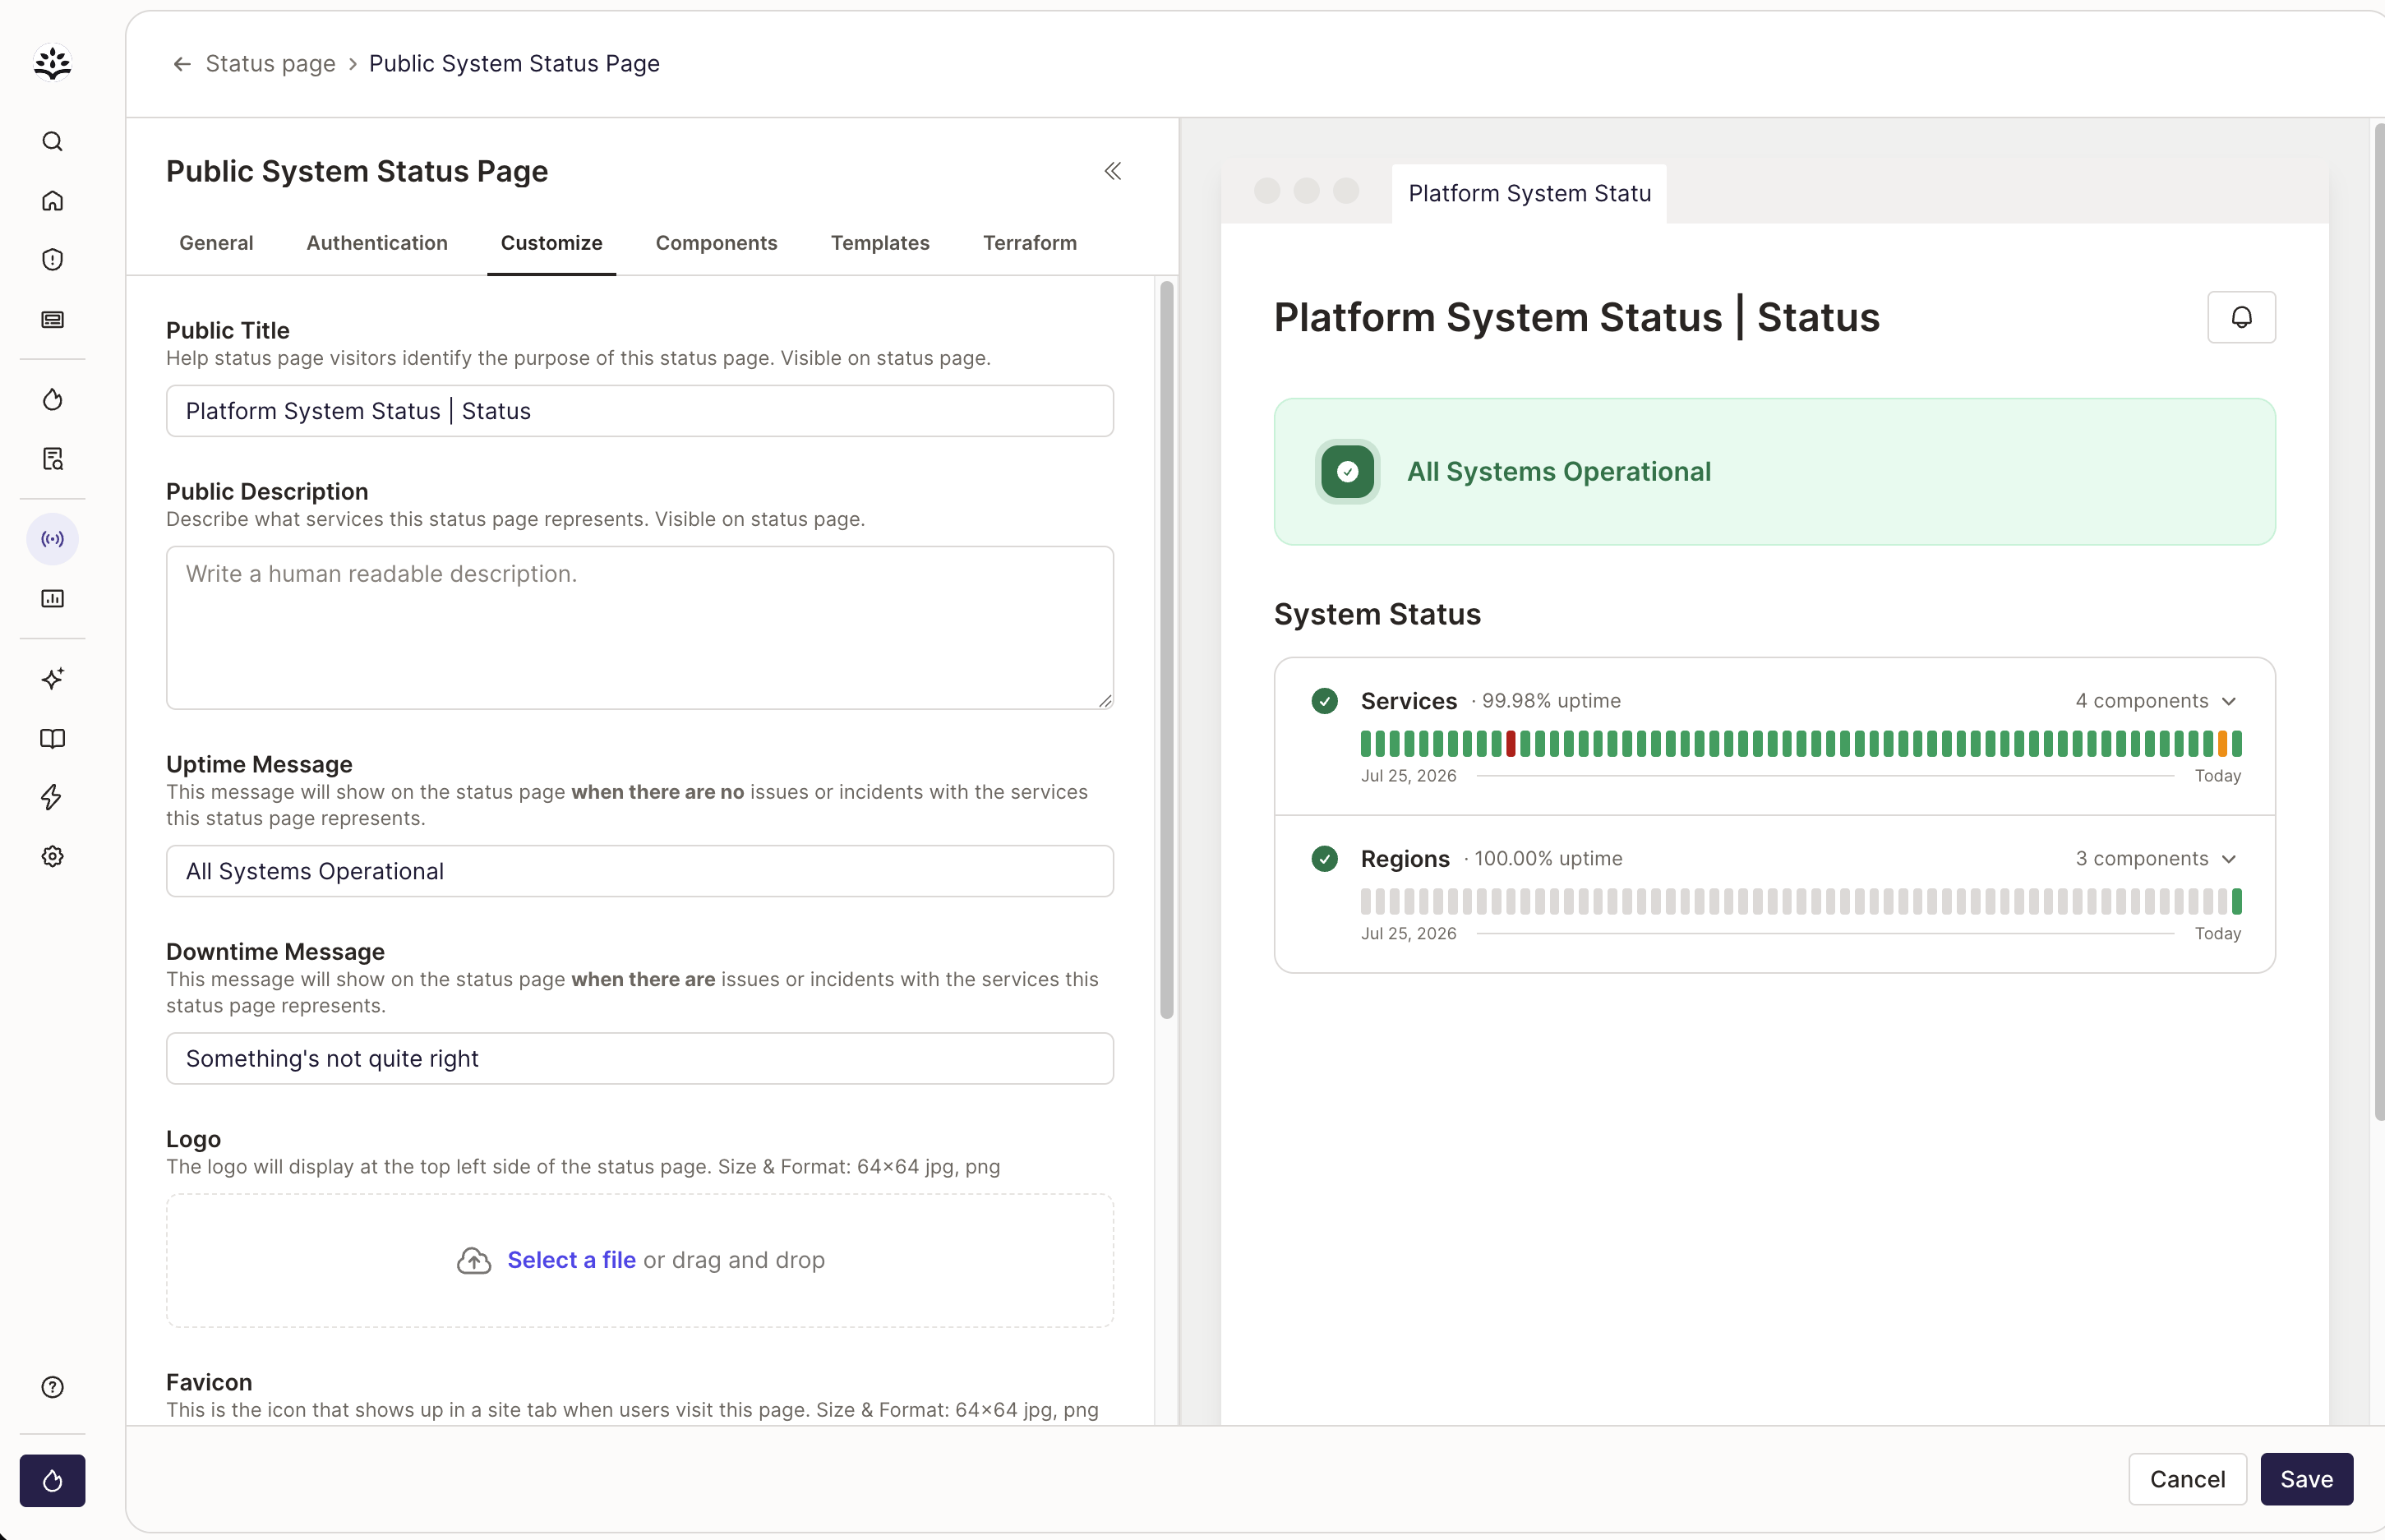
Components
Use the Components tab to choose what appears under System Status on your page. Add catalog services or custom items, then organize them into groups.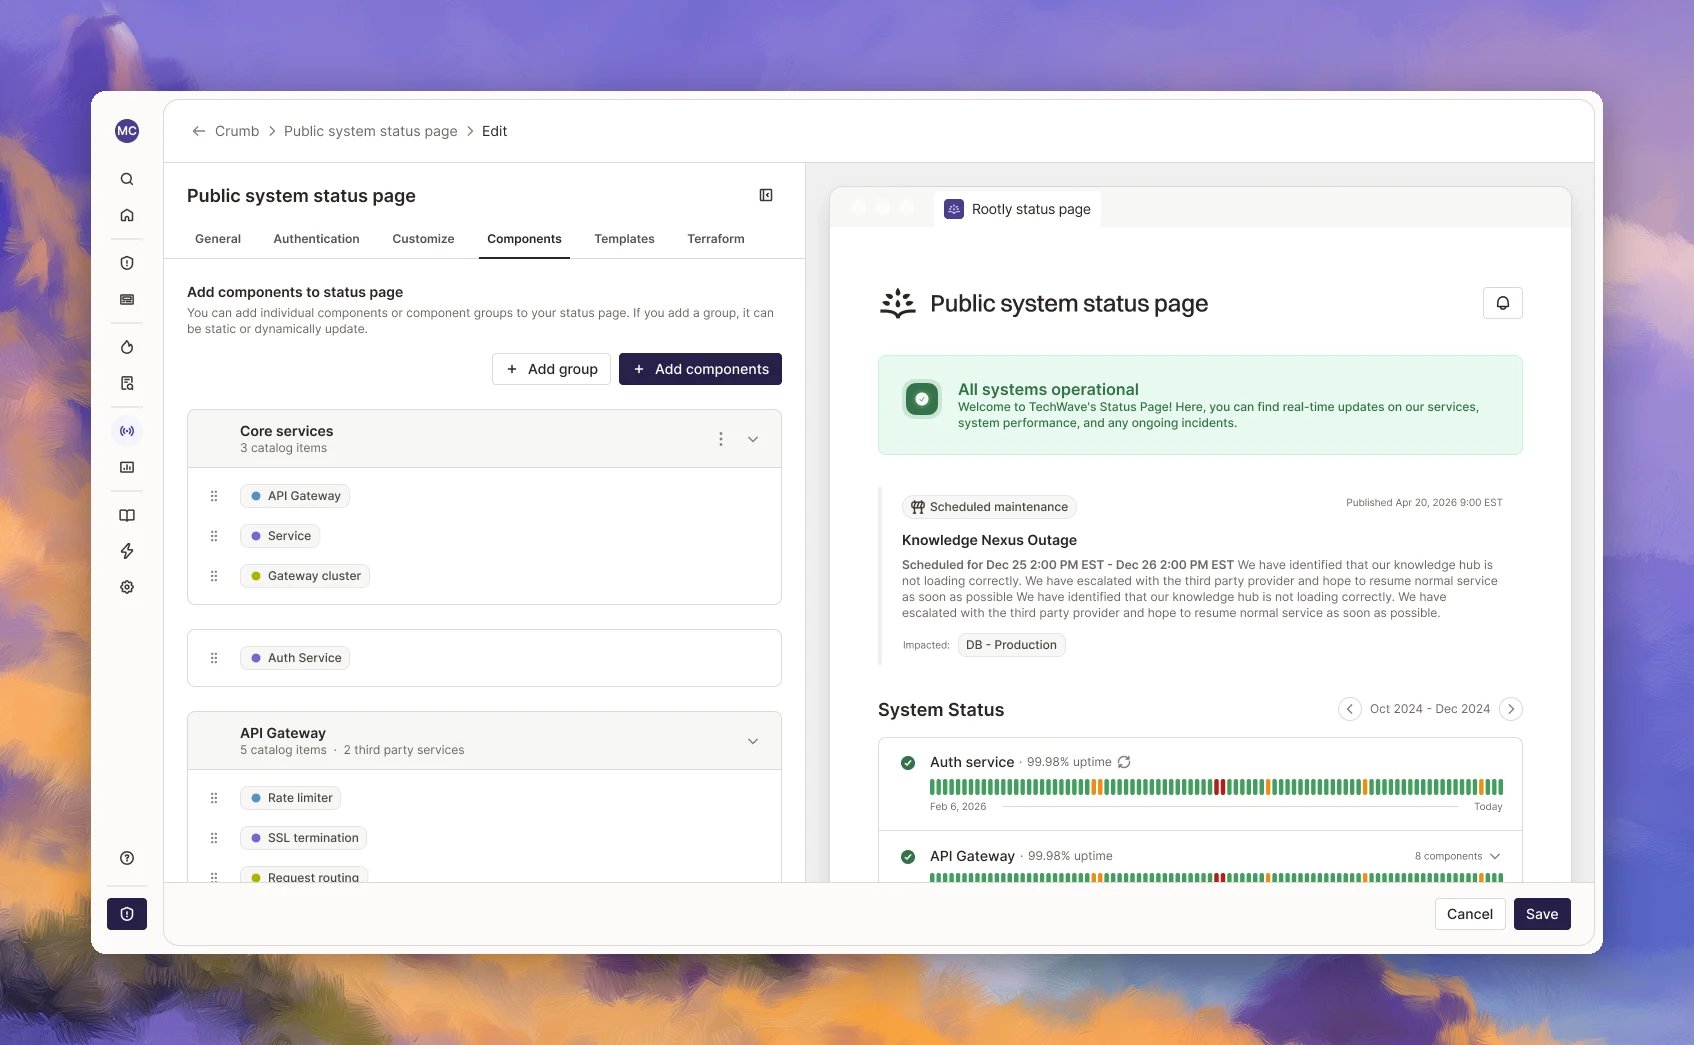
Templates
Standardize the updates your team shares with status templates. When someone posts an incident update, they can pick a template to help write it.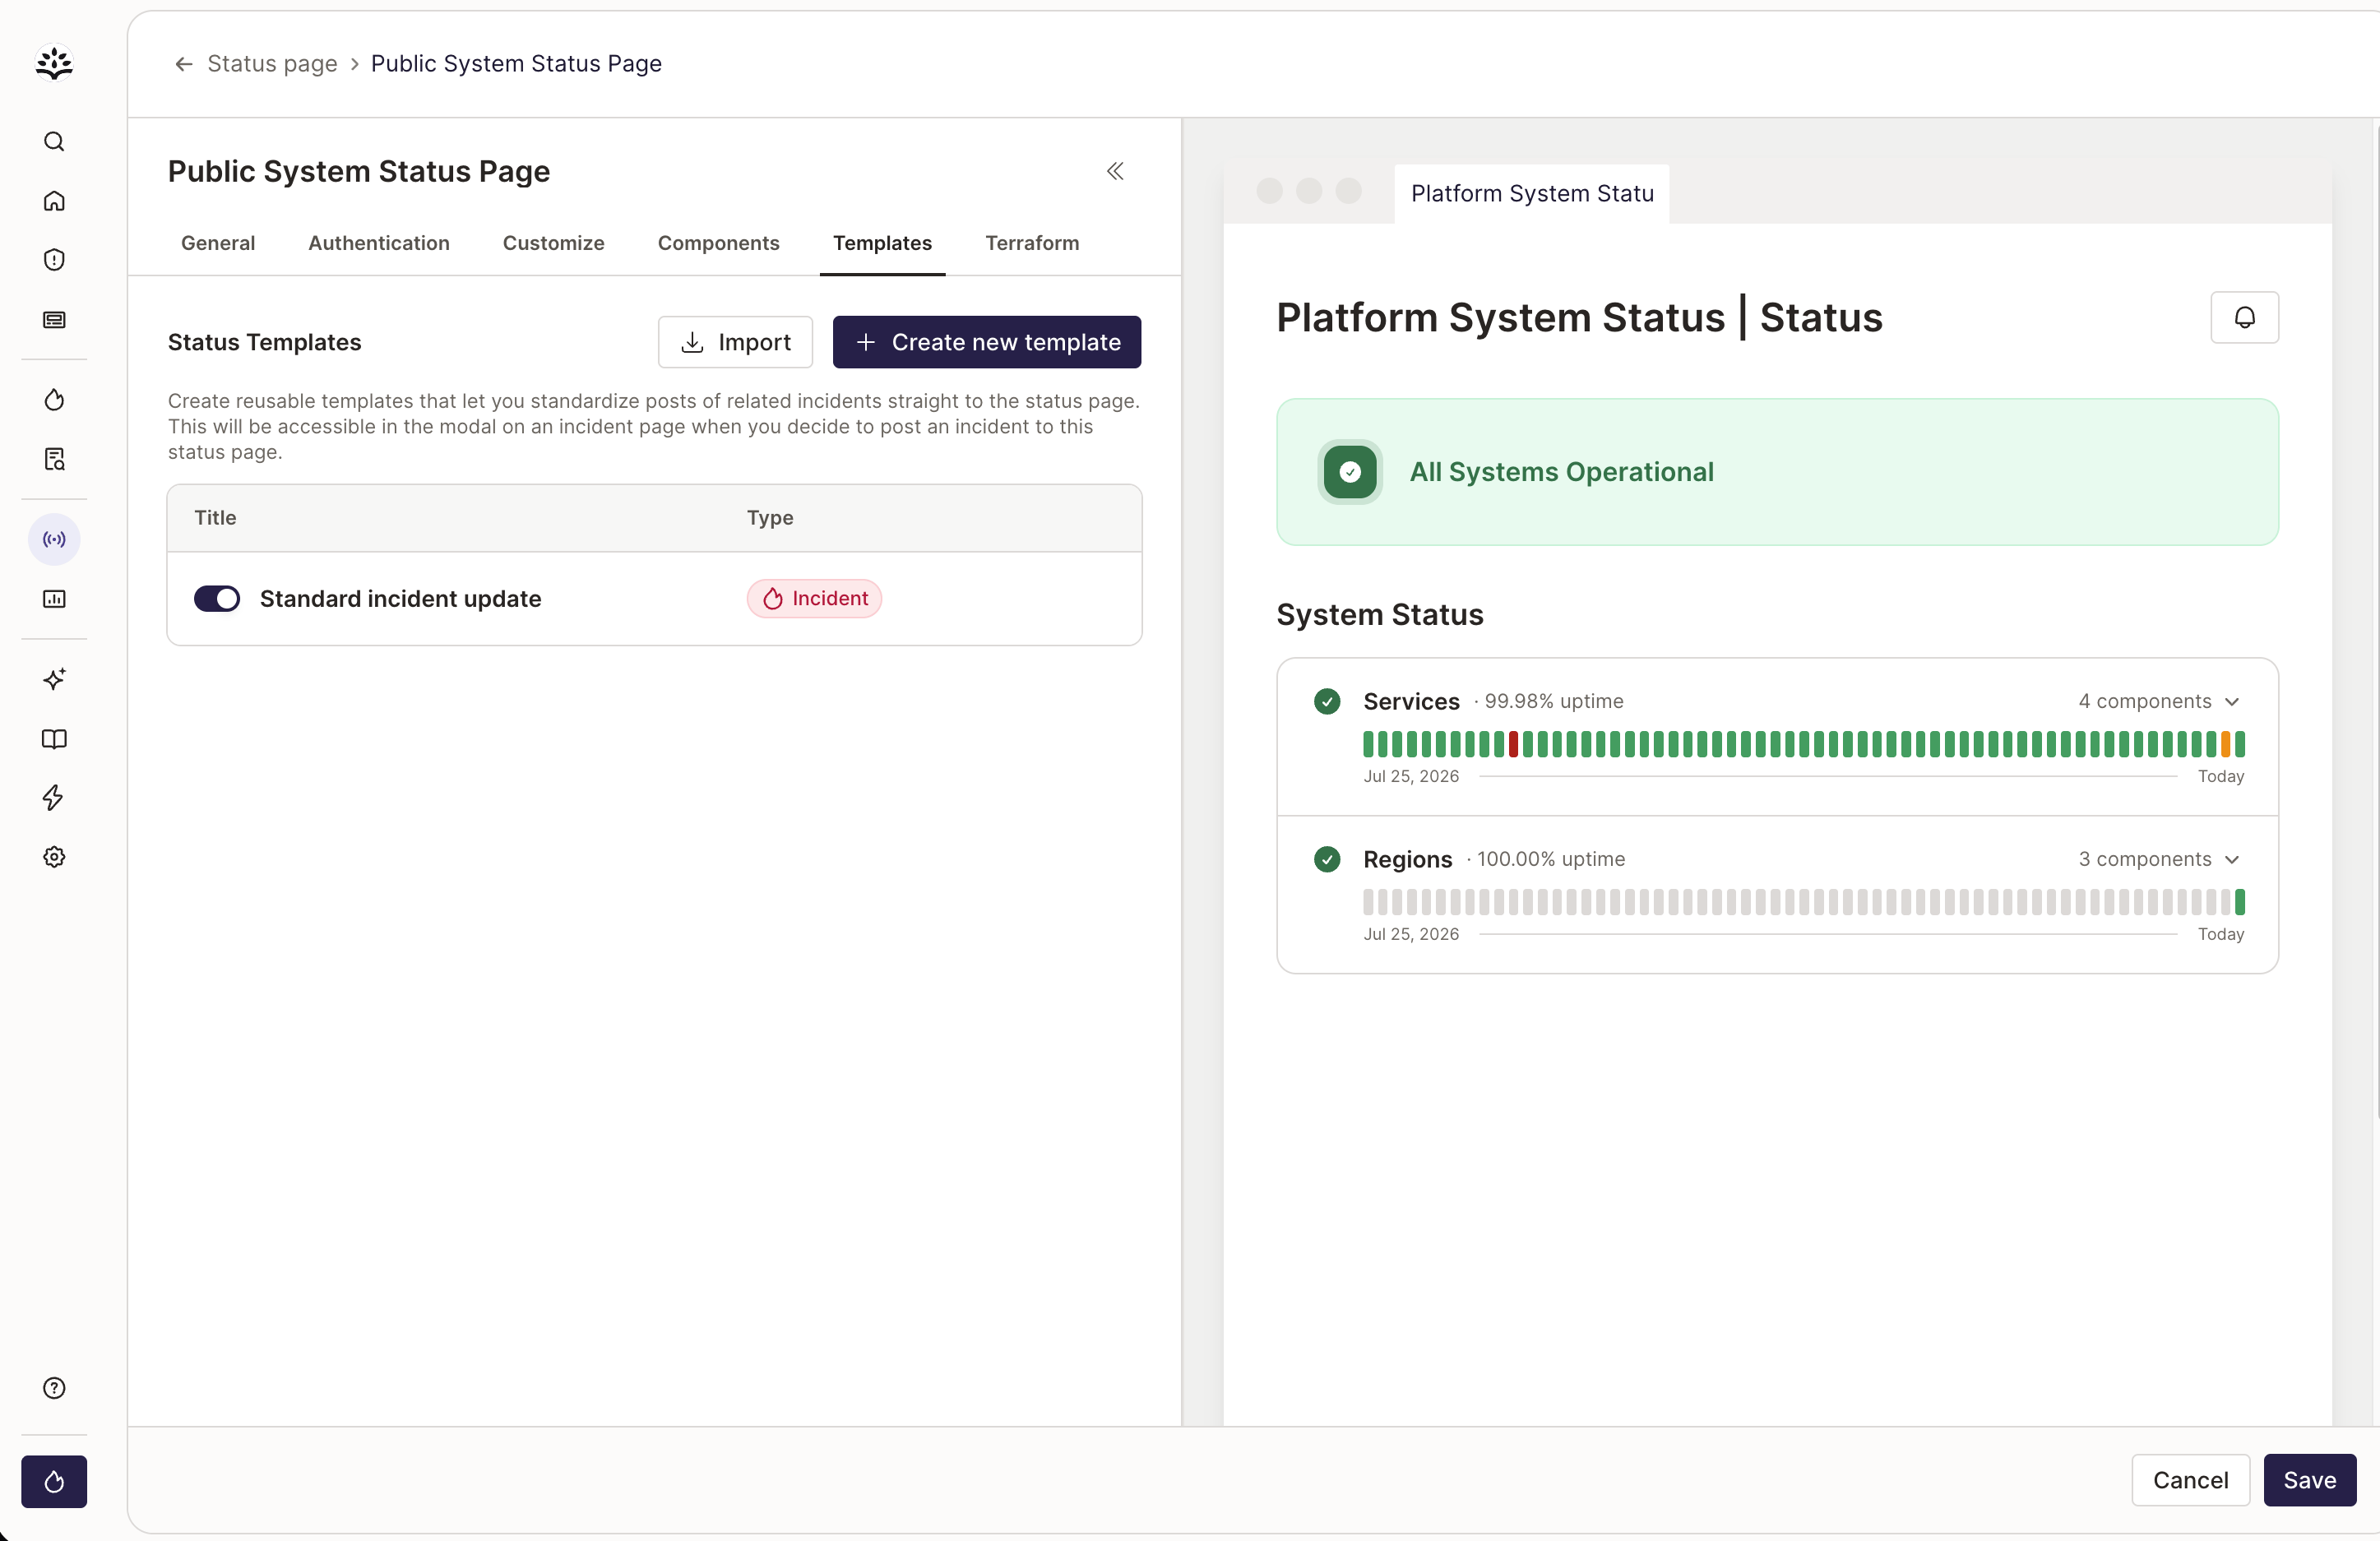
Go-Live Checklist
Setup spans several pages. Work through this before you point customers at the page.Pick the Page Type
Public or private. The choice drives everything below it. See the Status Pages overview.
Add Your Components
Add the catalog services and custom items customers care about. A page with a handful of customer-facing components is easier to read than one listing every internal service.
3
Group and order them
Put related components in groups and drag them into the order customers should see.
Write Your Templates
Templates are what responders reach for mid-incident. Writing them under pressure is how inconsistent updates happen.
Decide Who Can Reach It
A private page is limited to people logged in to Rootly. A public page is reachable by anyone with the URL. If that’s too open, add password or SAML authentication, which is available on public pages only.
Point Your Domain at It
Public pages usually want a custom domain. Both the CNAME and CAA records are required, and DNS changes take time, so do this before you need it.
Post a test incident
Post a low-severity incident, check that it looks the way you expect, then resolve it. See Publishing Updates.
If the test incident shows up with the right components and impact levels, the page is ready.
Related Pages
Components
Communicate the status business entity your customers care about with Components.
Custom Domain Names
Point your own domain at a Rootly status page with CNAME + CAA records.
Publishing Incidents
How incident updates get pushed to a status page from Web or Slack.